Retreat dates and availability
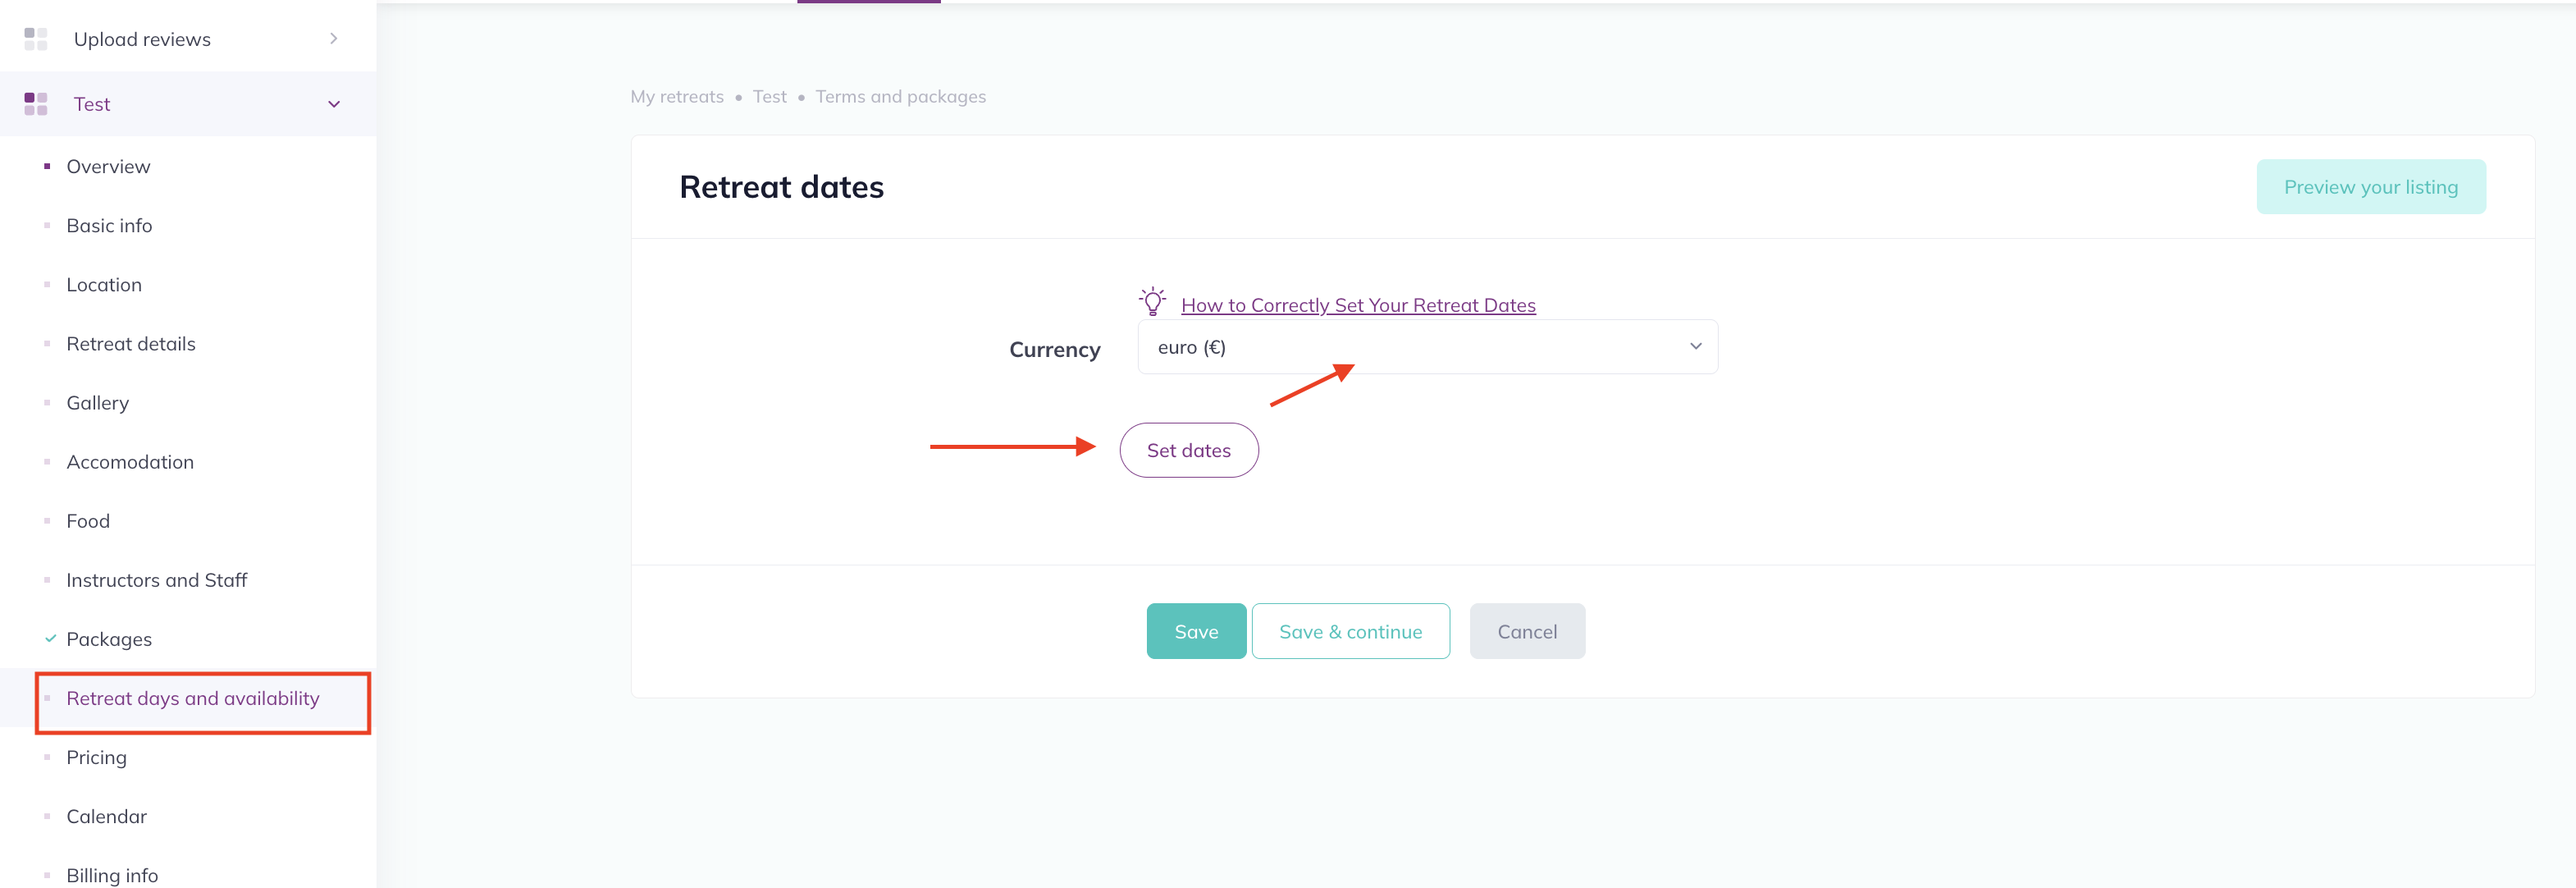
In this section, you will create your retreat dates, link the previously created package inventory to these dates, and set the package availability. Start by selecting the retreat currency and clicking the "Set Dates" button.

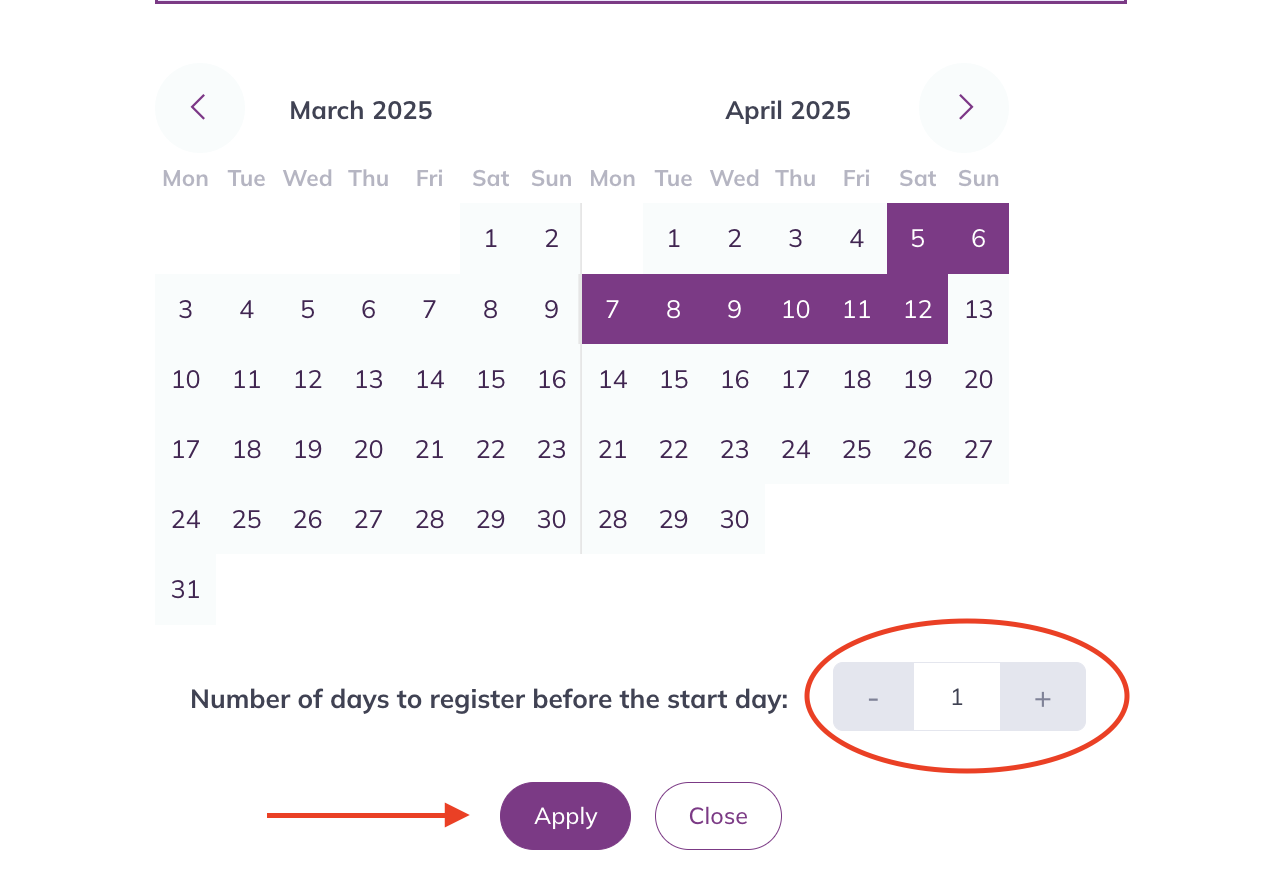
1. Select the dates on the calendar and click "Apply."
Determine the 'Number of days to register before the start day.' This indicates how many days before the retreat start day, your retreat or retreat date will be taken away from the listing online. We recommend leaving it at 1 day, but if you are certain that you do not want to accept new registrations, for example, 5 days before the retreat begins, you can set it here. Please note that your retreat or retreat date will not be listed online during these days leading up to the start day.

2. Adding More Retreat Dates
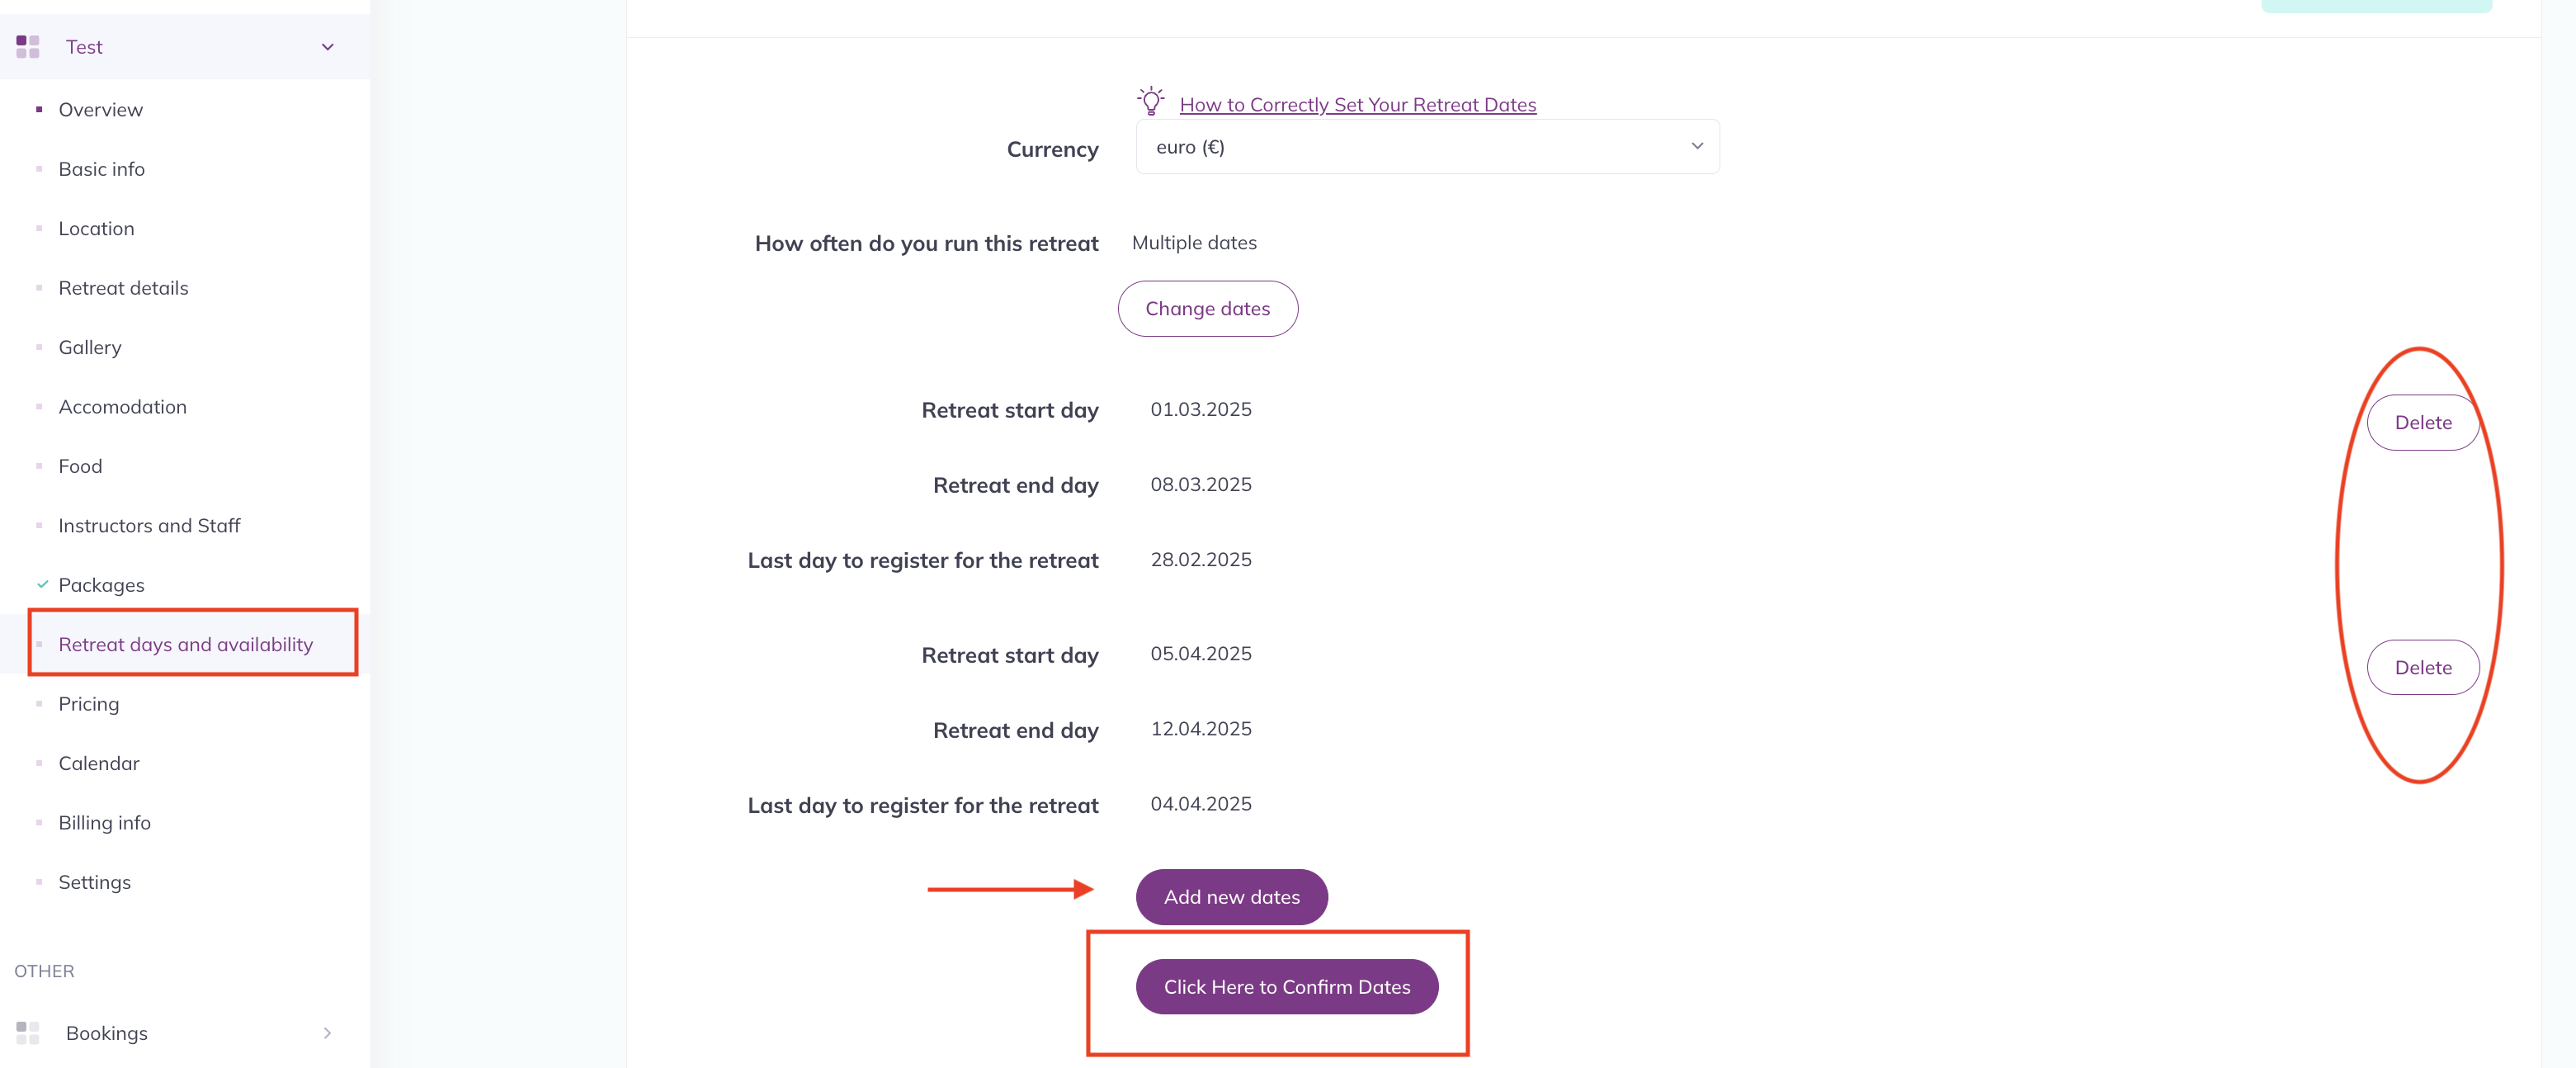
You can add multiple dates to your retreat by clicking the "Add New Dates" button and repeating the process from step one. Please review your dates carefully; you can still delete them at this stage if they are incorrect.
Once you confirm the dates by clicking the "Click Here to Confirm Dates" button, the packages created in the previous step will be uploaded. After confirmation, you will no longer be able to delete or modify the dates.
If modifications are needed, you can reset all dates and set them up again from the beginning.

3. Setting Up Package Availability
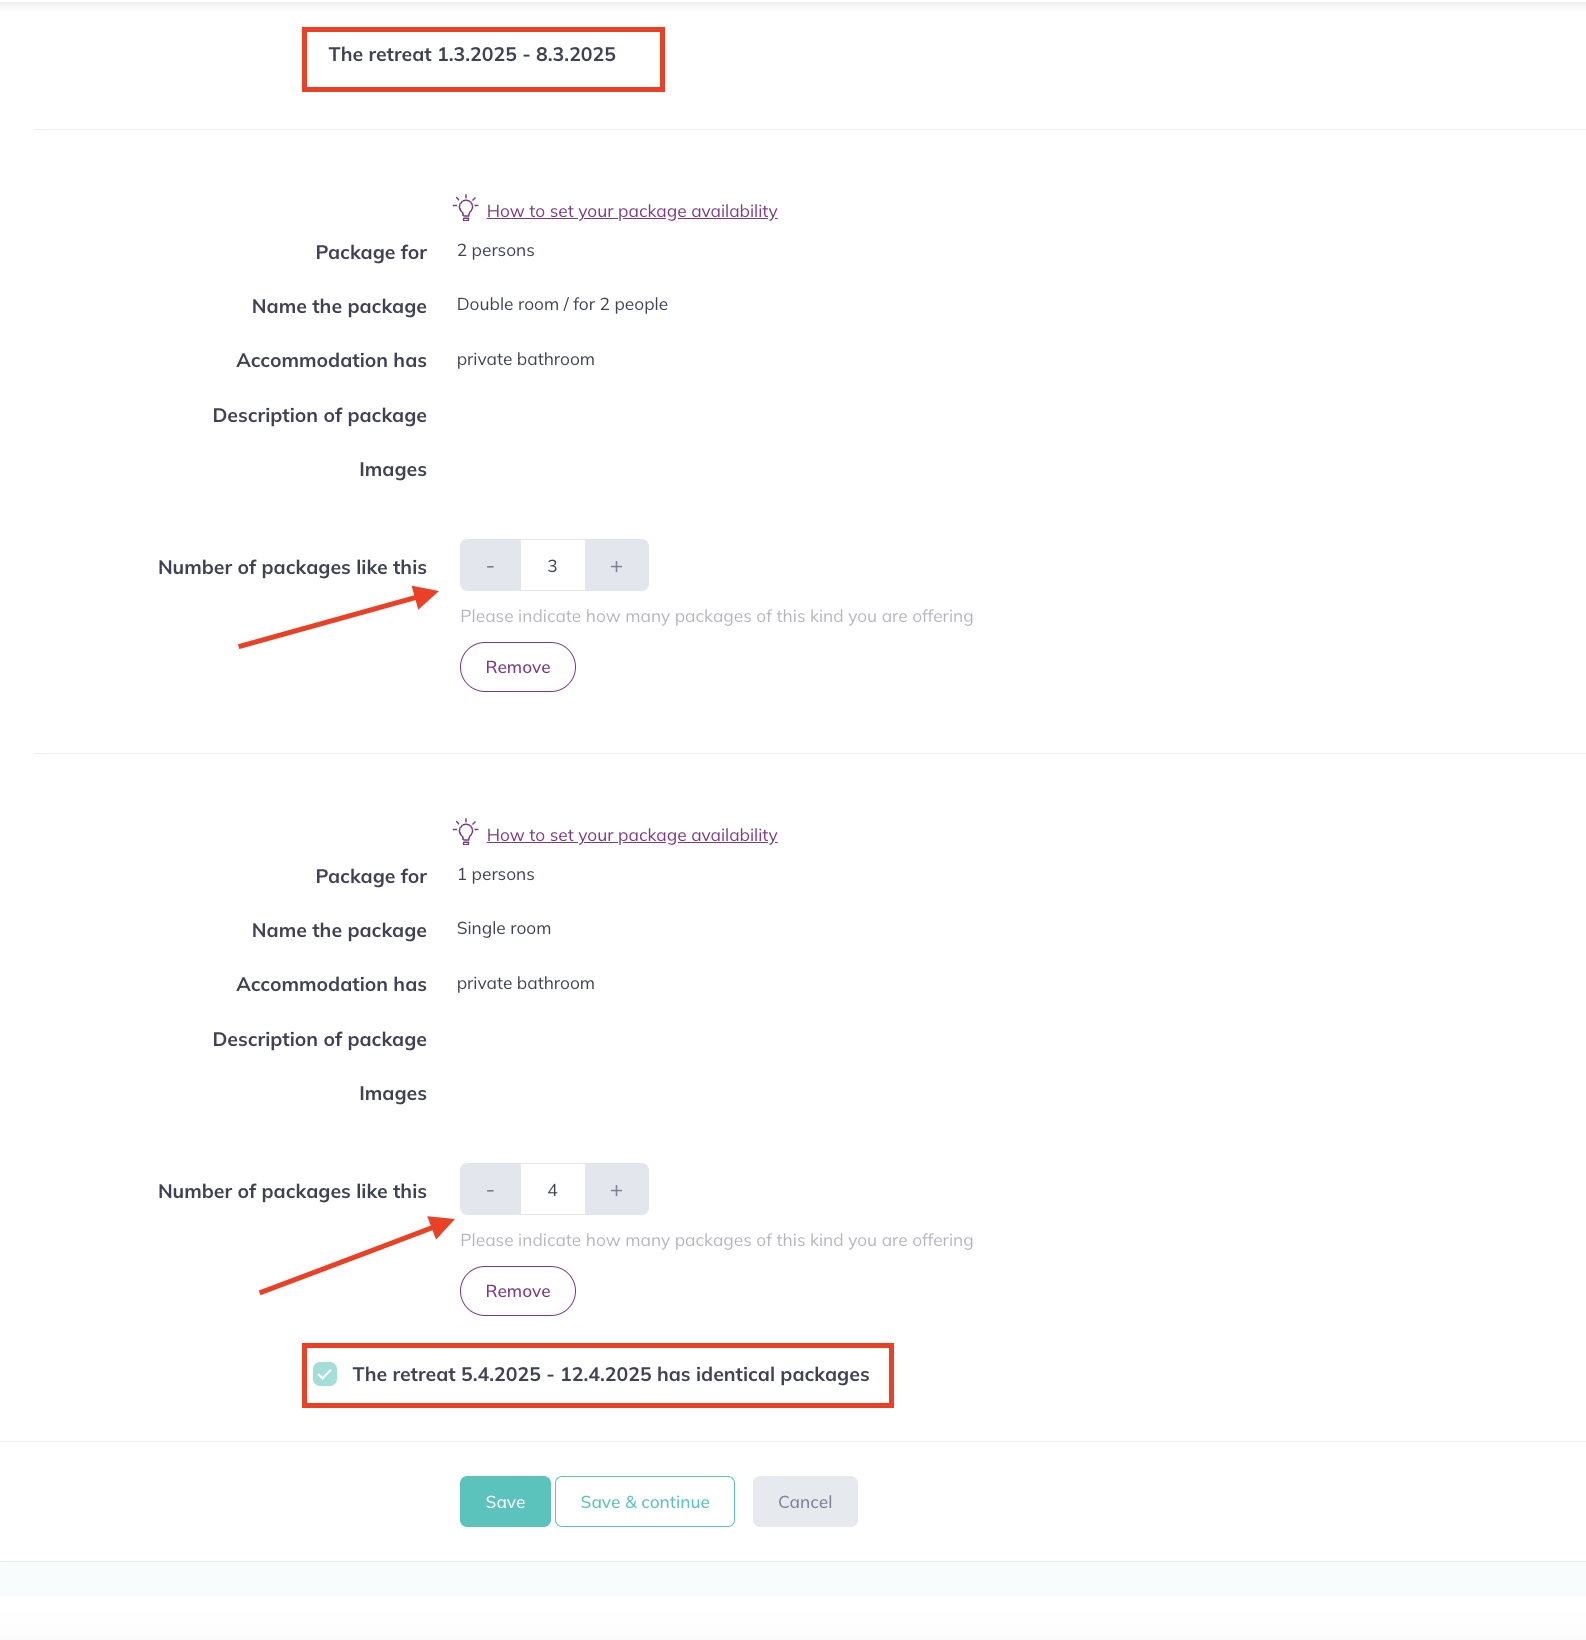
Once you confirm the dates, all packages from the previous section will be uploaded for the dates you have created. You need to adjust the availability for each package. For example, if you have 4 single rooms available, set the availability to 4.
If your retreat has multiple dates, the settings from the first retreat date are copied to all other retreat dates by default. To adjust availability for each date separately, untick the option "The retreat date -date has identical packages", and you can then modify the settings for each date individually.
If certain packages are not available for specific dates, you can remove them by clicking the "Remove" button.

Don't forget to save your settings!
